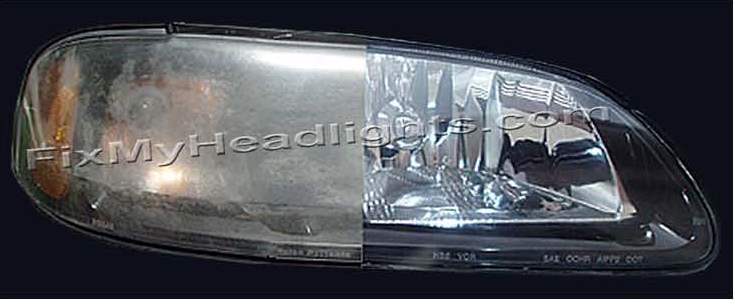
EZ4U2 Headlight Restoration Kit Produces Professional Results Everytime

|
|
|
|
|
|
|
|
|
|
|
|
|
|
|
|
|
|
|
|
|
|
|
|
|
|
|
|
|
|
|
|
|
|
|
|
|
|
|
|
|
|
Headlight Restoration Service
Search by Keyword
Save Hundreds With Our EZ2 Use DIY Headlight Restoration Kit
VOLVO DIY Headlight Restoration Kit
ONLY $24.95
The Same Headlight Restoration System We Use In Our Service
This Is How You Restore Your Volvo Foggy or Cloudy Headlights
The instructions below will work on Volvo Models: XC90, XC60, XC70, S60, S40, S80, V50, C30, C70
To restoring a Volvo foggy or cloudy headlight is the same as restoring the headlights on a Mercedes or BMW. The principle of restoring headlights remains the same throughout the industry. There are basically four (4) steps
- Sand the foggy headlights starting with a coarse grit then to extra fine grit
- Polish you headlights
- Clean the headlights with a pre-spray
- Seal the headlights lenses with a quality headlight restoration sealant
Most Japanese cars like your Honda, Toyota and Nissan all models you can start sanding with #400 grit sandpaper or possibly a 1000 grit and then move on to 2000 grit sandpaper. But with the Volvo we suggest start sanding with #220grit sandpaper especially if the headlights are partially foggy. Restoring the Volvo headlights are a little more intense than a Mercedes or BMW. I am not saying it to discourage you but just being realistic with you. The lenses are built tough. However when you do your headlight restoration right people would think your installed new ones.
If your headlights are crystal clear on some areas and foggy or cloudy in the other areas that means you have some of the manufacturer sealant still on your headlights. Headlights in this condition are a little more difficult to clean and restore than those that are completely oxidized, yellow or cloudy white. Based on my experience in headlight restoration, Volvo headlights have extremely tuff sealant on them. Using #400grit sometimes skids off the sealant with very little effect. For that reason starting with #220 grit sandpaper would be more effective when restoring partially foggy headlights or headlights that are just starting to get foggy or cloudy on any Volvo vehicles.
What you need before getting started
- EZ4U2 headlight
restoration kit
Kit Contents:
4 pieces wet / dry sandpaper- 1 each 220 /400 / 1000 / 2000 grit
2 white and 1 blue towels, 1 glove, 1 polish, 1 pre-treater, 1 sealant and instructions. - Spay-bottle with water or water hose
- Roll off blue, green or regular masking tape
- A scissor
- Paper towel or rags for drying and cleaning headlights and surrounding areas.
- A shaded area to work comfortable
Specific directions for restoring Volvo foggy headlights:
i. Tape around the headlight to protect your cars paint job
ii. Begin wet sanding your foggy
headlights with the 220 grit sandpaper from side to side until your headlight
has a consistent dull look.
Then go to the 400 grit followed by the 1000 grit and then 2000
grit sandpaper finishes your sanding. Now your headlights should look nice and
clean with a low sheen
iv. Start
polishing your headlights.
Apply a dime size amount of the fine cut polish on the white towel that came
with your headlight restoration kit. Put a little extra energy in polishing
your headlights. Obviously after polishing your headlights
it would look a little brighter. Now they do not have to be
crystal clear! That will happen when you seal them. Trust me you will be pleasantly
surprised.
v. Pre-spray the headlight lenses with the lenses cleaner and leave it for about 10 to 15 seconds then wipe dry. The pre-spray strips away any grease or polish residue from the lenses. Plus it helps to open up the pause of the headlights creating the right condition to receive the sealant to make an excellent bond.
vi. Sealing your Volvo headlights
to look like new.
This is where your hard work pays off. It's like magic! Right in front
your eyes you will see your once foggy headlight transform to a like new
headlight.
You see from step ii to iv you were simply cleaning your headlights. By
using a high quality headlight restoration sealant that is provided
in the EZ4U2 headlight restoration kit makes all difference in your Volvo headlight restoration.
Take the blue towel from the kit and saturate about one inch of it with
the sealant. Next apply the sealant from one side to the next side of
the headlight making sure you overlap by about 50% on each pass. Here is
where you will understand why this headlight restoration kit is one of the
best headlight restoration kits on the market today. Your Volvo
headlights will bring a smile to your face in amazement seeing them
transformed from just clean headlights to headlights that look like
new.
That’s how you restore your Volvo cloudy or foggy headlights.
Follow The Direction
In The Instruction Video
For A Limited
Time Only
The #220 Sand paper
is included in the kit
Watch Your
Foggy Headlights
Transform To Look Like
NEW!
customerservice@fixmyheadlights.com

